| Section Page | Previous Page | Next Page |
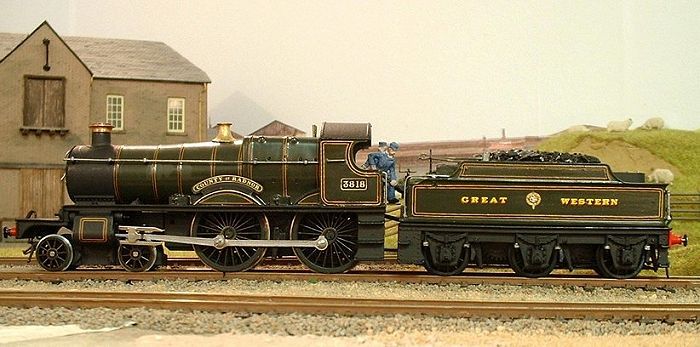
Backdating the Hornby 38xxby David Passingham
This is an account of how I backdated a Hornby 38xx Class 4-4-0 County Class loco. It is not a blow by blow account but I hope it will inspire you to have a go, as I did, and find out you can have something different on your layout without having to build a kit and worry about motorising it. I do not have any special tools and my workbench is about a metre long and thirty centimeters wide. Items used This is a brief list of most of the things I used:
Modifying the loco
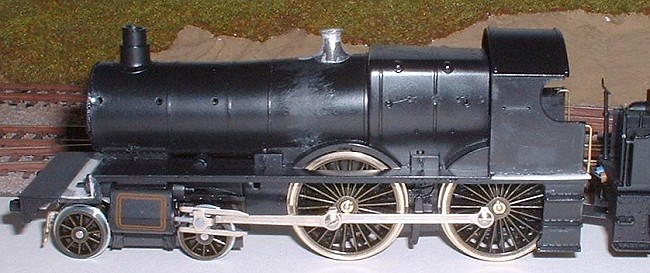
First find as many pictures and line drawings of the loco you are modelling as you can. To start, the existing safety valve cover and pipes need removing from the boiler as in 1906 it was further back towards the cab. Next, as this is a straight-framed version the front of the footplate needs cutting off (check with your line drawing to find exact place to cut). Keep this safe, as you need some of it and the buffer beam to glue back. The smoke box needs shortening, so while the saw is out take off what is needed from the front, after removing the smoke box door (I think it is two or three millimetres, but check with your drawing). This might not sound much, but does make quite a difference. Now back to the frames: Find some plastic card of the correct thickness and make up a straight frame. Again check with the line drawing for size. Add the cut off buffer beam and length of frame to make correct over all length. Reinforce underneath with shaped thick plastic card. Glue back onto main body with more reinforcing underneath. Make sure it is dead level while the glue is setting. If you look at your picture you will see that the top of the piston is on the outside of the frame at the front, so cut this off the extra cylinder block and glue in place. I re-wheeled my loco with the kit from West Coast kit centre. It was very easy as everything is included and uses the existing con rods. You will need to add pickups to the wheels if you are going to use the Deans Goods tender – also somewhere to solder the wires from the tender to. I also made side frames for the front bogie and added bogie brakes fashioned from plastic, removed the Hornby coupling and made new safety bars to line up with the bogie wheels. The cab steps need altering. I cut off what I needed to from the main body and added to them with pieces from the spare body – again look at your picture or drawing. I have since seen that Comet Models supply cab steps with holes in, as these should have, so I think I might have to do some more surgery. You will need to add a thin strip of plastic at the bottom of the cab to continue the straight line of the frames. Cut a slot under the footplate to allow the wire from the tender to pass through. Add wire hand rails to the cab, straighten the reversing rod and re position and I think the loco is finished. Just needs paint, transfers and etched name and number plates. Adapting the tender Now for the tender. Mine arrived with no wire to connect to the loco so I had to solder some fine wire onto the electrical connections on the top of the motor. While the tender was in pieces I decided to lower the height of the coal, so cut off the top of the weight that fits over the motor. Cut the top off the moulded coal and cover the hole with a shaped piece of plastic. Paint mat black and after final painting cover the coal area with a thin layer of real coal. I also added tender brakes by drilling the tender frames and hanging the brakes from wires, with wires below to represent the brake rigging. They just about fit under the motor and look realy good – well worth the effort. The foot plate on the tender needs raising to the same height as that of the loco, so I built it up with a box of plastic card, added new wire hand rails to the correct shape, fitted a new drawbar to connect to the loco, new brake handles and fire irons. The tdenr was then painted applied transfers and varnished. I hope that is everything; as I did not keep notes as I went along, just keep referring to your pictures and drawings. Hope this is not too difficult to follow – it looks a lot worse than it is and I think worthwhile (well you can judge for your self with the photos seen here). Have fun. David You can see more photos of David's 38xx on his layout "Maeport East" in the GWR Layouts section. |
| Section Page | Previous Page | Next Page |