| Section Page | Previous Page | Next Page |
David Geen 4mm Diagram Y3 Fruit Vanby Graeme Pettit
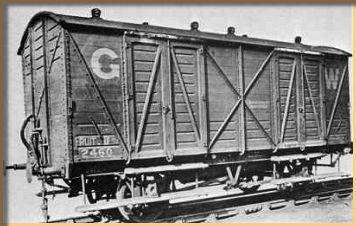
There were around 100 Fruit C/D types built to the Diagram Y3 version provided for in the kit, and I have constructed two examples. The Y3s were built in the years 1911–12. Having a sustained traffic, and being of a largeish size from new, many of these vans lasted well into BR days, with some entering preservation. The potential exists to build variants with Westinghouse brakes (Fruit D), or without and vacuum fitted only (Fruit C), and to have variations in the layout of steps.
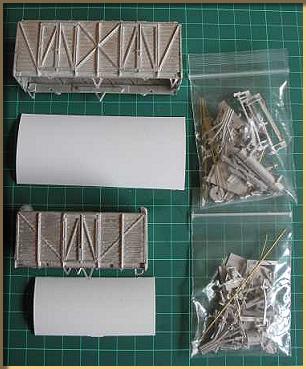
The kit as supplied is composed of reasonably well cast and detailed whitemetal parts. Some parts of the kit needed heavy trimming – this was particularly true of the axleboxes, which, in turn, has caused the bearing holes to be slightly off centre. The instructions contain a some historical information, layout diagrams in side- and end elevations, and a "fax quality" picture of the vehicle 2460, which is just about adequate for details on positioning the parts. In my kit (dated 2000) there were no details on the underframe however, so a few hints on this: You will find in the kit a flat piece of whitemetal, shaped like a fat letter T, with an offset hole in it. This is what is supposed to be a floor. I found that it fitted quite nicely in the recesses on the top side of the brakes, if you attached the brakes to the backs of the solebars. Onto this, where the hole is, you should mount the vacuum cylinder opposite it. Where the "T" is wider, you can mount the gas cylinder.
You could, alternatively, make a floor yourself from plastic sheet. For this I prefer "Evergreen" plastic sheet, as it snaps cleanly when scored lighly, and makes sizing up parts easier than many other makes. Rigging the brakes is down to a knowledge of how they worked in reality. If you have this, then assembly can be logical – if not, then you need a diagram.
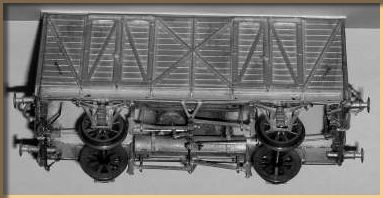
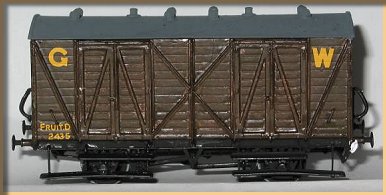
The photo on the right shows the model nearing completion, although I have made a mistake here: The upper steps should be level with the base of the solebars, not the equivalent of 9" below. This comes from not working from reference photographs! Those lower steps could also do with some straightening, and I need to fit couplings, as well as lettering at lower right-hand corner. The roof also needs weathering.
Y3s in preservation Below, I have listed all the Fruit C/D Y3 (and also Y2) types of which I am aware are in preservation. Some, although perhaps not all, correlate to the David Geen kit. I suggest you visit the relevant websites (or better still, go look on site with your own camera) for pictures, and don't forget to photograph the underframe details!
These details are understood to be accurate at July 2002, but may be subject to change. There could be others. |
| Section Page | Previous Page | Next Page |