Detailing the N gauge Dapol Siphon G
by Maurice Pearce
First published in the N Gauge Society Journal, January 2004
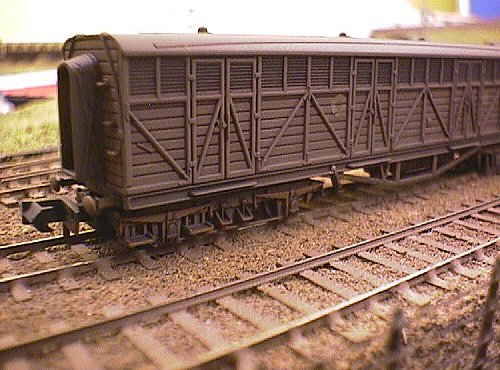
Detailed and weathered Siphon G
These models are great straight out of the box. The mouldings are crisp and the printing and painting are very fine. They are quite up to the printing standards we have come to expect from Bachmann/Farish. The bogies are well detailed with very free-running blackened wheels, and are fairly close coupled.
The prototype
I have a great personal fondness for the Siphon G, which had a distinct body shape and unique character. Dapol have chosen wisely with this model as the prototype GWR version numbered 1443 was built way back in June 1916 and was not withdrawn by BR until July 1957, a useful working life of 41 years, (one survived in service 45 years). It should appeal to a great many modellers as they ended up scattered all over the BR system after their former use came to an end. Let's face it, prior to this new range there have been very few realistic pre-Nationalisation prototypes with the exception of the Minitrix Gresley teaks.
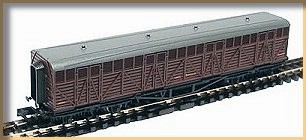
The Dapol Siphon G as supplied
The Siphon G was originally built to carry conical milk churns, double stacked, which were cooled by the air rushing through the louver vents. Typical routes were from the West Country and Wales up to dairies in London and the other prominent cities on the GWR system.
This is one of the GWR vans known collectively as the 'brown vehicles'. That is to say vehicles rated as suitable for express passenger workings. The majority of vehicles in this group were fitted with vacuum brakes and passenger bogies. Over time bogies were often changed and they ranged from a 9' wheelbase fitted as built to 7' ones at withdrawal. This model is fitted with 9' pressed steel types.
Detailing
My overall impression, this is a very welcome addition to RTR 'N' gauge. However, there are a few cosmetic changes that can be made to personalize your model if you wish:
Opening the box...
Removing the model from its jewel box casing requires a bit of care because it is tightly packed and there is a danger of damaging the buffers. If you have a scalpel handy, stab the inner foam liner and ease out the whole of it including the coach. No scalpel handy, then use a thin steel ruler to prize it out. You can now safely separate the coach from the box lining.
Roof
Examination shows the body shell to have captured the roof shape beautifully and it has the correct gas lamp tops on the roof. However the piping is not represented. That is one job that could improve the look, especially as we are always looking down on our models so roofs take on extra importance!
Slaters fine plastic rod can be formed into the gas piping linking each lamptop. There is a rare rooftop picture of a siphon G on page 66 of the book 'GW Siphons by Jack N Slinn and Bernard K Clarke. This manual is an essential reference work, for fans of the siphons.
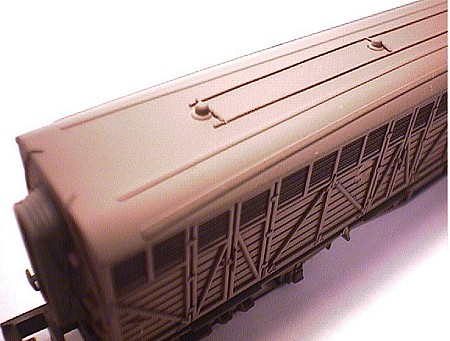
Roof-top gas piping from fine plastic rod
Ends
The hand brake is correctly represented as to the left on one side and to the right on the other. On the ends the steps are neatly moulded and the handrail will probably have to do as it could not be moulded away from the body. You could try bending up some wire to suit but to get 4 handrails looking exactly the same is doubtful. The gangway on the other hand is in desperate need of cross bracing to turn it into a scissors type. Thin paper strips glued on and painted will achieve that. The buffers are superb representations of the GWR tapered square shank coach type. I would not change them unless damaged in an unfortunate accident. In which case they could be replaced with brass ones from B & H Enterprises.
Bogies
Turning now to the bogies. As I stated above they represent the 9-foot pressed steel GWR bogie, which was not fitted with a truss bar, but the more usual 7-foot bogie always was. This bar was quite a distinctive feature and whilst to fit them to this bogie would not be correct it might make it look more prototypical.
Obviously a bit controversial this, however see what you think in the photograph. Anyway if you wish to fit them, fine hard straight wire secured with superglue (use one of the thicker types) will do the trick.
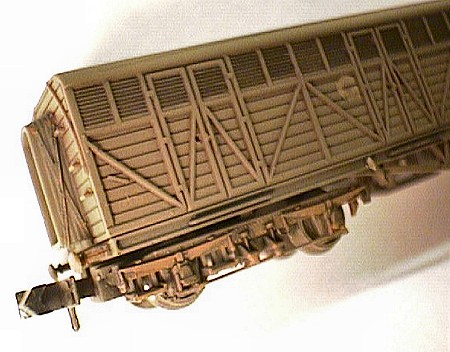
Optional truss bar on bogies
Sides
On the real thing there was a hand hole in the door just by the handle to enable the door to be opened from the inside. A simple drilled hole will represent that feature. There is precious little else that you could do to it to improve it apart from re-paint it to suit your period.
Weathering
Over the years liveries changed little in that they appeared nearly always a uniform filthy brown colour whatever it was meant to be (GWR brown or BR crimson). So it is either a case of heavy weathering or the addition of GW markings again to suit the period. I model the late 1930s so I tried to represent the van as it might have looked following the end of the depression and not having been painted for at least 10 years.
Maurice Pearce
|