Weathering a 70' Post Office sorting van
by Mick Bonwick
(Mick describes here the weathering on a customer's Post Office sorting van (diagram L14) running in the 1930s. The model is thought to have been built from Trevor Charlton etched zinc sides and ends. More of Mick's work can be seen on his RMweb blog.)
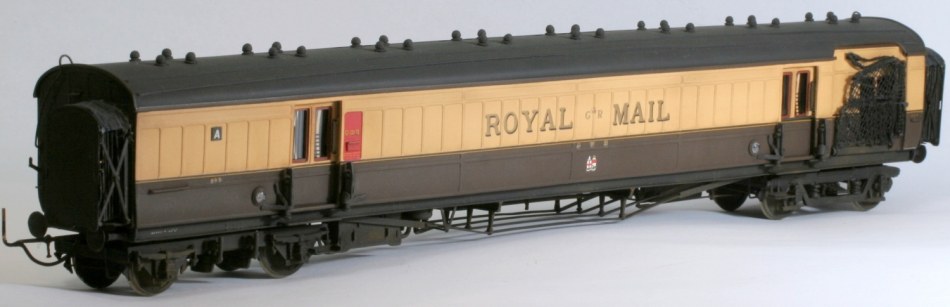
The finished vehicle
Introduction
This vehicle was to be very lightly weathered, with road dirt accumulated from a short time in service and nothing allowed to become totally obscured by grime. Windows are still relatively clean and only edges and corners have accumulated dirt. There is a slightly heavier accumulation in nooks and crannies and on the underframe but, for the most part, it is a good advertisement for the company.
I did't envisage using large quantities of anything, but the difficulty would be portraying a very light coat of dirt without making it look blotchy. Materials and tools used were minimal, but the time taken wasn't. Placing weathering materials carefully rather than just sloshing them on can take up a lot of time, especially if once it's on you can't remove it entirely! I planned to use pigment for most of the work – AK Interactive Dark Earth. Application was by using small brushes, a round no 2 and a filbert no 2 or 4. Being a panelled coach, the real challenge was representing the dirt buildup around panel edges, and then to photograph this so that it can be seen.
Materials and tools
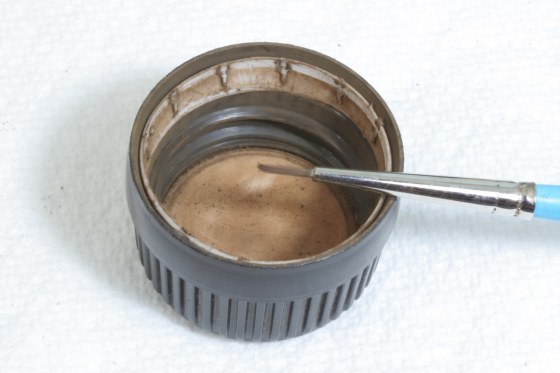
The main pigment used for this model is AK Interactive Dark Earth. This choice comes from studying photographs of lightly weathered brown and cream coaching stock from many eras, including preservation examples. The paint finish on the model was such that it held pigment very well, so care was needed where it was applied in the first place.
Most of the application was done using a normal round (or candle flame) brush, size 2. This gives a fairly narrow point for positioning the pigment, although this 'widens' as the process continues – pigment buildup will gradually force the bristles apart. A filbert brush and cotton buds were also used for manipulating the pigment once it was in place.
Pigment is placed on the tip of the brush by picking it up from the inside of the jar lid. This will nearly always have a very thin layer of pigment adhering to the plastic liner of the lid. The particles will be the finest of the jar's contents, therefore ideal for our purposes. |
 |
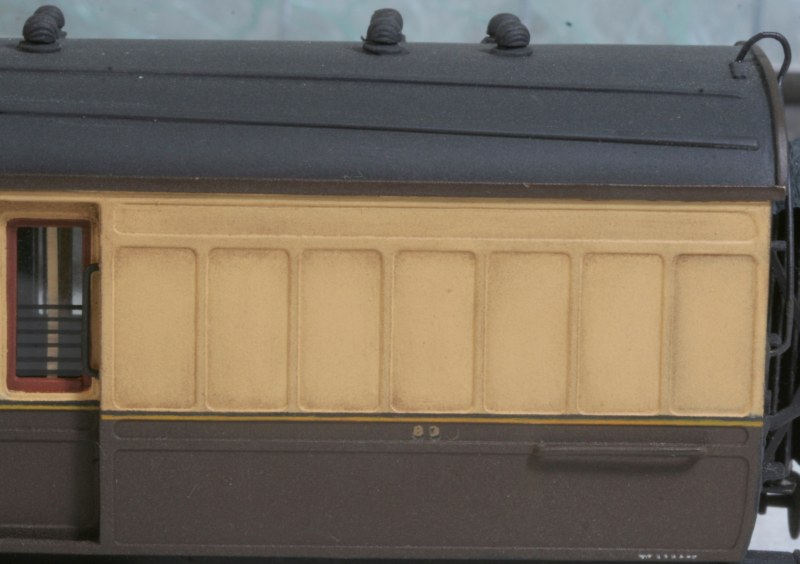
Applying the pigment
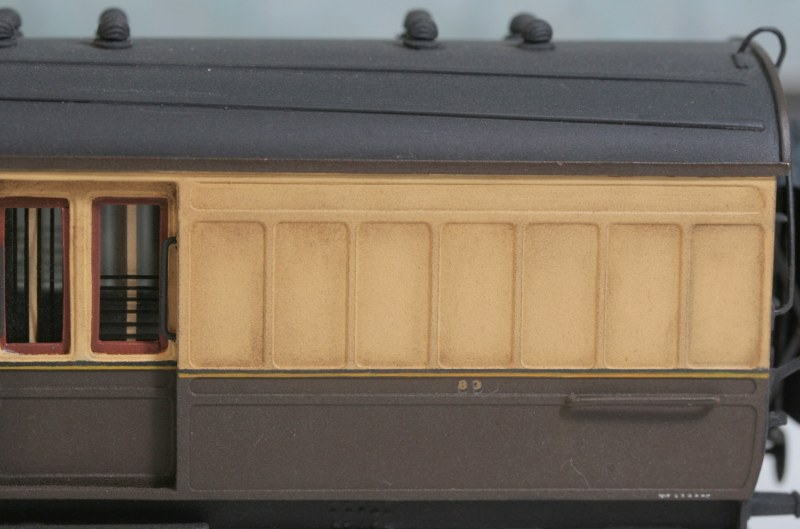
Very small amounts of pigment are placed, using the tip of the brush, into the panel edges to create a strong shadow effect. At first the effect is be too strong, but later work reduces the contrast. Because the pigment goes everywhere if given the chance, the work area is kept as clean as I can possibly make it. When working on the panels the vehicle is laid on its side, and if there is any excess pigment lying on the paper towel, it will transfer itself to the coach side when applying to the uppermost side. Guess how I know that.
The application continues to fill in all edges and corners of all panels. It takes a while... |
 |
Removing the pigment
Continuing the panel work, the same method as described above is used to place pigment in all edges and corners, making an absolute mess of everything. Please note that I didn't do this without first testing on something that didn't matter!
Once all the pigment has been applied, work begins on modifying the appearance. Clean cotton buds were used for this, but not the type that fall apart as soon as you look at them. The ones I use are intended for use with make-up rather than with small child things. They are more tightly wound and last much better. The method used is rather wasteful in terms of numbers, but the dirty ones can be used again for other weathering tasks.
The photographs show the sequence followed, applying more pigment, distributing it to the corners and finishing off. |

|
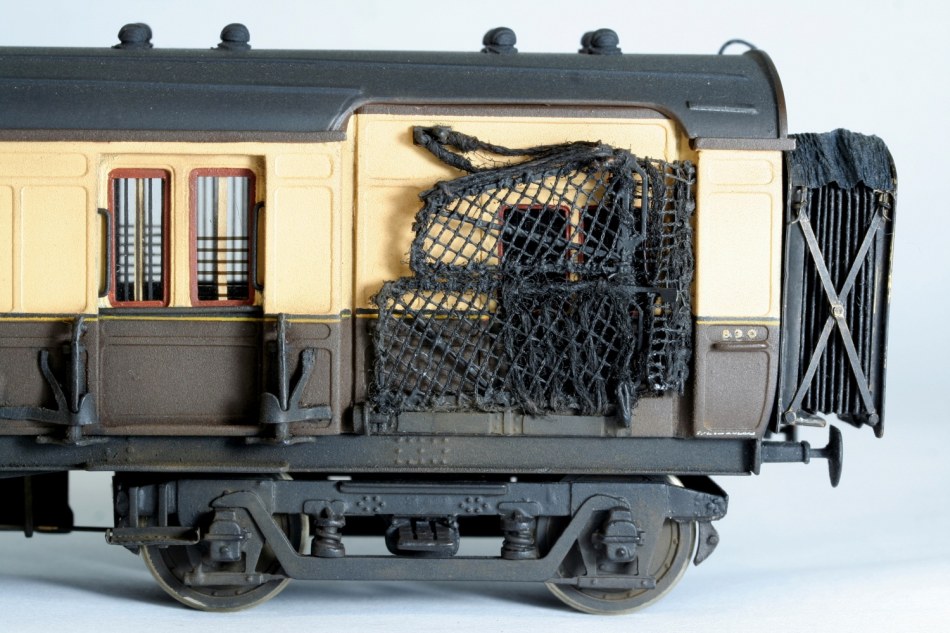
Underframe
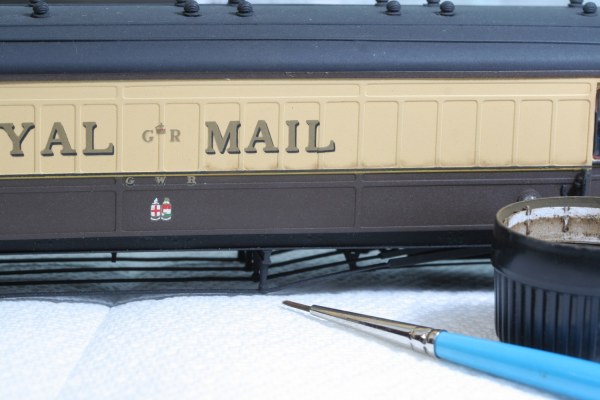
The panels and the rest of the sides are completed, and it's time to attend to the underframe. The shade of black used to paint the underparts represents a fairly worn state, so the only work required was to add something to break up the evenness of colour. Once again, AK Interactive Dark Earth pigment was used for this in the main, but some small amounts of MIG Productions Russian Earth were used as well. When looking at the carriage through a camera lens the difference is barely noticeable, and the photographs don't give any hint of it at all, so I don't know why I bothered.
You may be able to see that the pigment has been tucked into corners of doorways and the recess for the nets.
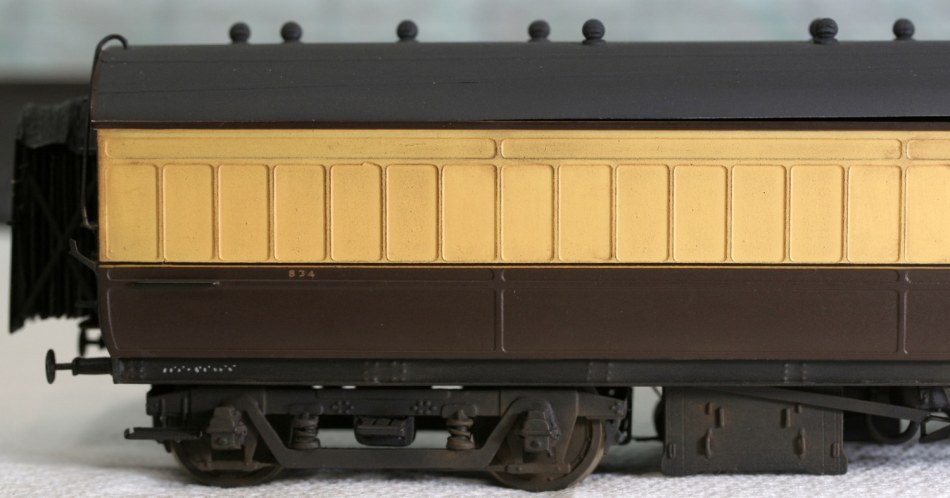
Finishing touches
The filbert brush has been used to pick up the 'dust' remaining in the pigment pot lid, and the brush then gently wiped on a paper towel to remove the larger particles. The brush is then gently wiped against the panel edges, at right angles, so that the very edge of the detail collects the 'dirt'. Easier to do than describe. No need for precision, this group of panels was done all at the same time by wiping from the left-hand end of the coach along to the right-hand end, without stopping, and back again, repeated several times.
|