The Ratio 4-wheelers
by Mikkel Kjartan
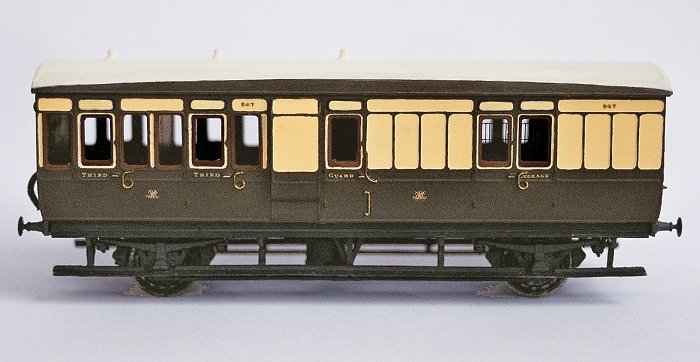
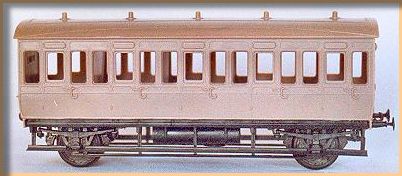
Diagram T47 Brake 3rd from the Ratio kit
The Ratio 4-wheelers constitute an excellent introduction to first-time OO kit-builders. The kits are plastic, quite accurate and come together easily. Given their prototype history, they also have a fairly wide scope for application, both in term of period and use. With the introduction of the Shirescenes conversion sides, this scope has been extended further.
On the down side, these kits have been around for so long and are so popular that they do tend towards the cliché. Moreover, one or two of the kits are based on prototypes that were in fact not as 'typical' or common as some modellers think. However, I find that their excellent potential as an introduction to kit-building makes up for this.
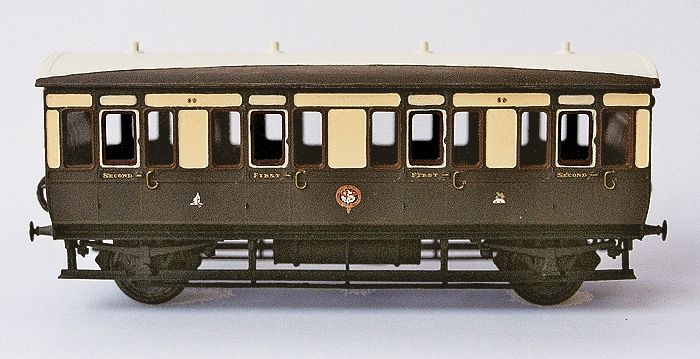
Composite Diagram U4
The prototypes
Throughout the late Victorian era, the GWR introduced hundreds of 4-wheel coaches, consisting of many different diagrams and designs. Many of these were introduced under Dean, parallel to the development of large fleets of 6-wheelers. The 4-wheelers tended to dominate on branches, given their ability to negotiate tighter curves, but would occasionally appear in mixed rakes on other lines also.
By the 1920s the 4-wheelers were in decline on most parts of the system, although some branches retained the 4-wheelers into the 1930s. A limited number of coaches even survived beyond that as Departmental stock or on workmens trains.
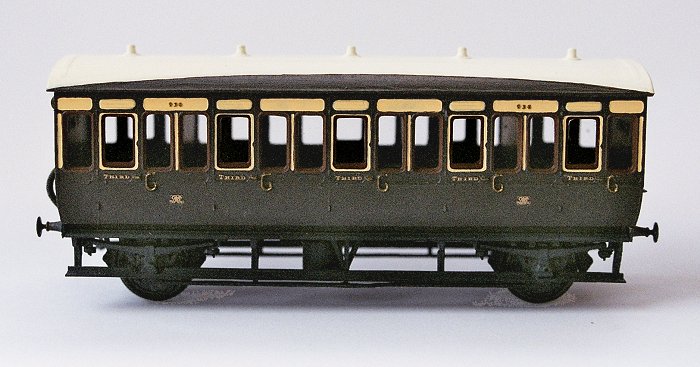
5-compartment 3rd Diagram S9
Modelling scope
The Ratio models represent the following types:
- Composite Diagram U4
- All 3rd Diagram S9
- Brake 3rd Diagram T47
The U4 and S9 were produced in large numbers throughout the 1890s. The U4 uses the S9 underframe and is in fact a little too long, but in a rake of several coaches this is hardly noticeable. The T47 was a less common vehicle, having only two compartments as opposed to the more widespread three-compartment T34. Note also that many 4-wheel brakes had the guards lookouts removed in later years, so the lookouts on the T47 may be incorrect if you are modelling a particular set on a particular line.
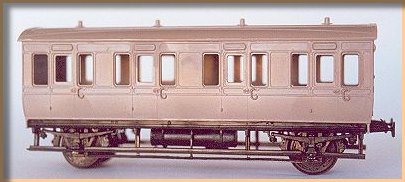
| The U4 during construction |
 |
One of the most common 4-wheel coach formations on GWR branches was Brake 3rd, Composite, Brake 3rd. This consist was often made up of a T34, a U4 and another T34, so if you are looking to model this particular combination, the S9 and T47 are strictly speaking less useful.
That said, there are at least three instances were the Ratio diagrams ran together: In 1900, sets composed of U4s, S9s, T47s and the full brake V5s were built to run in local Ruabon–Dolgelly services. And in 1902, sets composed of the three Ratio diagrams and an E73 composite were built for local workings in the Bristol area. Finally, the Ratio diagrams seem also to have been working together on miners trains in South Wales in the 1940s, the livery being all-over unlined brown.
All in all, and with a little modellers license thrown in, the scope for using the Ratio 4-wheelers includes:
- Branchline trains, in most though not all parts of the system
- Some suburban trains, especially around Bristol
- Some mixed cross-country trains in pre-grouping times
- Workmens and miners trains, especially in Wales in the latter days of the GWR
- Departmental coaches, often converted
- As grounded coach bodies, if there's no other excuse!
| The S9 underway to completion |
 |
The kits
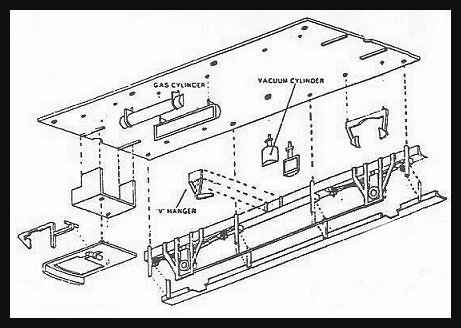
| No need to go into the actual assembly of the kits here, as the Ratio instructions are fairly easy to understand. They aren't comprehensive, but it really isn't that hard and there is a decent diagram showing chassis assembly. |
 |
A few tips on overcoming three small imperfections in the kits might, however, be useful:
- Removing flash
The instructions apologize for the flash found on some of the parts, apparantly due to worn mouldings. This is especially evident on the underframe sections and roof. On the underframes, the best approach is to remove the flash from the back, using a sharp scalpel. In this way, the risk of loosing detail is much reduced. The roof needs much care, as it is easy to slice away a strip of the roof itself when removing the flash too hastily. I try to make one slow, single cut along the roofline, using a worn blade as this does not 'wander' so easily.
- Preparing the stepboards
The stepboards are very fragile, and do tend to break when being prepared. To avoid this happening, the instructions suggest placing the stepboards on the edge of a book or suchlike before removing them from the feed pips. I personally prefer resting them firmly on the cutting map and applying a light pressure with one hand while cutting with the other. Once off, the stepboards reveal flash in the indentations made to clear the axleboxes. This is important to remove properly and entirely, as the boards will not fit otherwise. Unfortunately, doing this may cause the stepboards to break again! If this happens, a very thin, filed-down slice of plastikard beneath the stepboards seems just about the only way to join them again – glue on its own is not enough.
- Replacing brake rods and wheels
The rodding between the wheels constitute another fragile area. If these snap they are very difficult to join, so I tend to simply replace them with a piece of straight brass wire. This is easy to do and looks better. I also replace the wheels, as those provided are one-piece plastic mouldings. Instead I use Gibsons 14mm Mansell wheels with Universal wheel profile. These are fitted in unflanged pinpoint bearings, (also from Gibson) located in the frames by enlarging the axlebox-holes slightly with a small hand-drill.
I am currently painting the coaches in a simplified version of the 1900-style livery. A separate section on this will follow in due course.
|