Shirescenes Siphon C
by Mikkel Kjartan
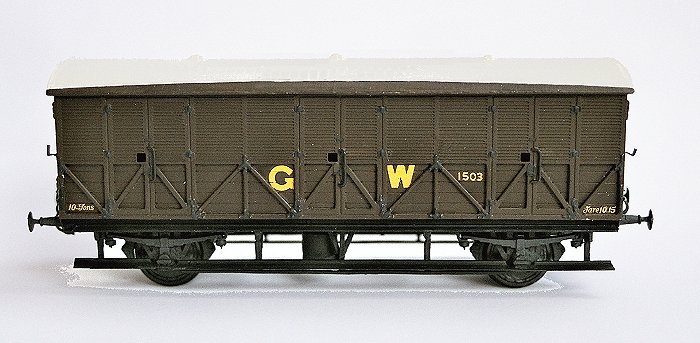
Siphon C No. 1503 from the Shirescenes/Ratio kit
Here is another of the Shirescenes conversion kits for the Ratio 4-wheelers. It is a very useful model, as it presents a fairly simple kit for a widespread and much favoured prototype.
The Siphon Cs were mostly used for carrying milk, often in a branchline context. They have a very compact and well-proportioned look about them (steady there, old boy) which makes them one of my favourite types of GWR rolling stock. Kit-bashing aside, there are to my knowledge no other 4mm Siphon C's on the market for the less experienced modeller.
 |
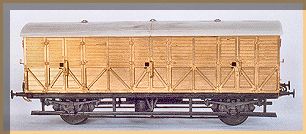 |
| The Siphon C before painting |
Main steps
Like the other Shirescenes conversion kits, the instructions are brief but just about sufficient (with a few exceptions, see below). The following is therefore just a brief run-down of the main steps.
- Building and shortening the Ratio underframe
The kit uses the Ratio plastic underframes originally made for the 4-wheel Brake Third to diagram T47. I bought both the underframe and the sides as a full set, and this included the original Ratio instructions for building the underframes. However, this may depend on the individual trader, so be sure to check that the underframe instructions are included when you buy. The underframe builds up fairly easily (see separate page on the Ratio 4-wheelers elsewhere in this section). It does however need to be shortened by a few millimeters at each end in order to fit the sides. I simply offered up the sides and cut the underframes accordingly.
- Folding the sides and ends
The etches for the sides and ends need to be folded up in order to produce the three-dimensional sides. The key is to keep in mind that the fold-lines in the etch always need to be on the inside of the etch. This sounds more complicated than it is, although I did have a little difficulty trying to get the outside framing to completely close the gap to the main body sides. Careful tweaking soon solved the problem however.
- Fitting the sides and ends
The folded-up sides and ends then need to be glued in place on the Ratio chassis. The etch has been treated to allow easy use of glue – I used superglue and this worked fine. I fitted the ends first, and the added the sides. The four inside corners were then secured further with glued-on blocks of rectangular plastic rodding. This is not mentioned in the instructions, but produced a more rigid body than would otherwise have been the case.
- Shortening the roof
As in some of the other Shirescenes kits, the instructions are a little vague on this aspect. Basically, a few millimeters need to be cut diagonally from the center of the plastic Ratio roof, in order for the roof to correspond with the length of the sides and shortened chassis. The exact amount to be removed will probably differ a little from model to model. I simply made a trial fitting of the roof and judged it on that basis. Cutting the roof was done with a razor saw. This was followed by careful filing and smoothing with wet and dry paper, in order to allow the two roof ends to fit back together as seamlessly as possible. As usual, I used liquid poly glue when joining the roof ends, as this dissolves the plastic slightly and allows the parts to "melt" together. Three ABS low ventilators were added to the roof.
- Adding the details
 Some people may prefer to do this before the sides and ends are fitted to the chassis. In any event, this is the time-consuming part. All hinges for the 6 doors need to be secured separately, as does the various strapping, lamp-irons etc. It is certainly worth the effort and most people can do it, but it is fiddly and repetitive nonetheless. The trick is to apply just the right amount of glue: Too little and the items won't stick – too much and it will overflow. I added the glue with the tip of a needle, but even this requires care. Some people may prefer to do this before the sides and ends are fitted to the chassis. In any event, this is the time-consuming part. All hinges for the 6 doors need to be secured separately, as does the various strapping, lamp-irons etc. It is certainly worth the effort and most people can do it, but it is fiddly and repetitive nonetheless. The trick is to apply just the right amount of glue: Too little and the items won't stick – too much and it will overflow. I added the glue with the tip of a needle, but even this requires care.
The grab-irons applied with the kit baffled me – I just couldn't figure out how they were to be attached (it's probably just me), and they seemed overly coarse compared to the other fittings. I ended up making my own, bent from wire. Buffer beam details included a new set of buffers from Alan Gibson, various vacuum pipes and coupling hooks. The 14mm Mansell wheels are also from Gibson.
That's it then. The result is a very decent little Siphon, useful on almost any GWR layout.
|